Can I apply Creative filters to images captured by EOS REBEL T4i/EOS 650D? (Creative filters)
15-Jun-2012
8201520100
Solution
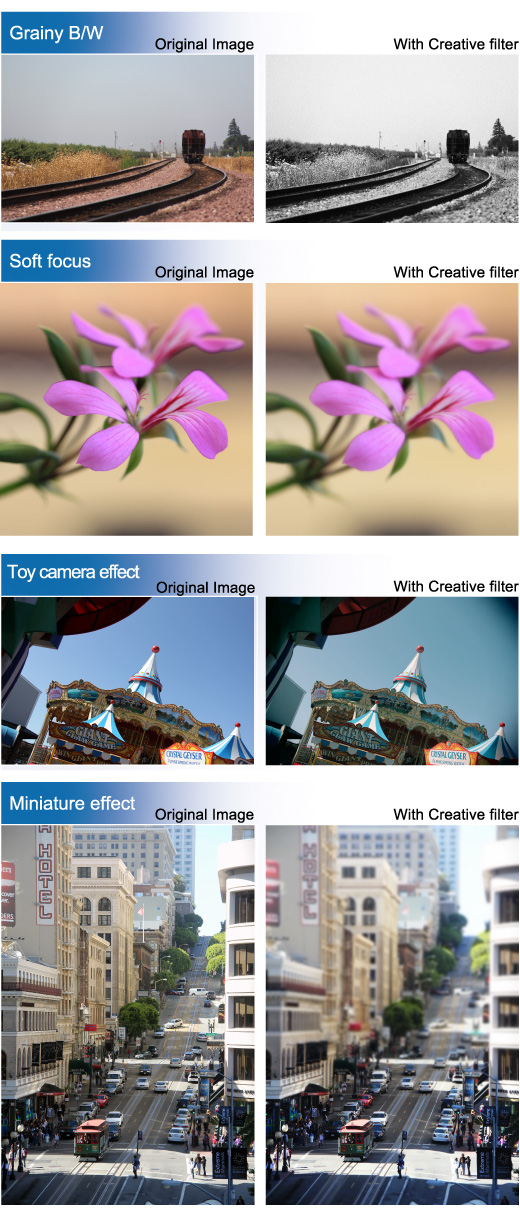
You can apply "Creative filters" to an image and save it as a new image: Toy camera effect, and Miniature effect etc.
| Grainy B/W | Makes the image grainy and black and white. By adjusting the contrast, you can change the black-and-white effect. |
| Gives the image a soft look. By adjusting the blur, you can change the degree of softness. | |
| Gives the effect of a fish-eye lens. The image will have a barrel-type distortion. Depending on the level of this filter effect, the area trimmed along the periphery of the image changes. Also, since this filter effect will magnify the image center, the apparent resolution at the center may degrade depending on the number of recorded pixels. Set the filter effect in step 5 while checking the resulting image. | |
| Art bold effect | Makes the photo look like an oil painting and the subject look threedimensional. You can adjust the contrast and saturation. Note that the sky, white walls, and similar subjects may not be rendered with a smooth gradation and may look irregular or have significant noise. |
| Water painting effect | Makes the photo look like a watercolor painting with soft colors. You can adjust the color density. Note that night scenes or dark scenes may not be rendered with a smooth gradation and may look irregular or have significant noise. |
| Toy camera effect | Gives a color cast typical of toy cameras and darkens the image’s four corners. By adjusting the color tone, you can change the color cast. |
| Miniature effect | Creates a diorama effect. You can change where the image looks sharp. In step 5, you can press the <INFO.> button to change the orientation (vertical/horizontal) of the white frame that shows where you want the image to look sharp. |
1. Set the power switch to <ON>.
2. Press the <MENU> button to display the menu.

3. Under the [  ] tab, select [Creative filters], and then press the <SET> button. Images will be displayed.
] tab, select [Creative filters], and then press the <SET> button. Images will be displayed.
- Press the <Cross Keys> to select the image you want to apply a filter to.
- By pressing the <
 > button, you can switch to the index display and select an image.
4. When you press the <SET> button, the filters will be displayed.
- Press the <Cross Keys> to select a filter, then press the <SET> button.
- The image applied with the respective filter will be displayed.
5. Press the <Cross Keys> to adjust the filter effect, then press the <SET> button.
For the miniature effect, press the <Cross Keys> and select the image area (within the white frame) where you want it to look sharp. Then press the <SET> button.
NOTE
For the miniature effect, you can press the <INFO.> button to change the orientation (vertical/horizontal) of the white frame that shows where you want the image to look sharp.
6. Select [OK] to save the image.
Note the destination folder and image file number, then select [OK].
To apply a filter to another image, press the <MENU> button to return to the image selection screen, and then repeat steps 3 to 6.
7. To exit and return to the menu, press the <MENU> button.
NOTE
When shooting  +
+ or images, the Creative filter will be applied to the image and the image will be saved as a JPEG image. If an aspect ratio is set for Live View shooting and a Creative filter is applied to the image, the image will be saved in the aspect ratio that was set.
+ or images, the Creative filter will be applied to the image and the image will be saved as a JPEG image. If an aspect ratio is set for Live View shooting and a Creative filter is applied to the image, the image will be saved in the aspect ratio that was set.