EOS Utility Ver. 3.x does not work properly / Uninstalling (deleting) and re-installing EOS Utility Ver. 3.x (Windows 8.1)
19-Sep-2019
8202364100
Solution
Please follow the procedure below to uninstall (delete) EOS Utility Ver. 3.x and then re-install it.
IMPORTANT
Before uninstalling (deleting) EOS Utility Ver. 3.x, confirm that all open programs have been closed.
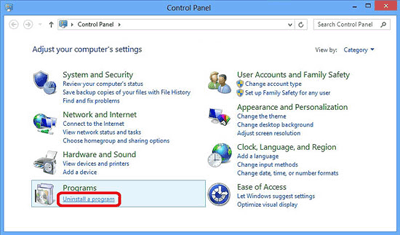
1. Click [Uninstall a program*] in the [Control Panel].
*If the display style is [Large Icons] or [Small Icons], click [Programs and Features].
2. Select  [Canon Utilities EOS Utility 3], and click
  [Uninstall/Change].
[Canon Utilities EOS Utility 3], and click [Uninstall/Change].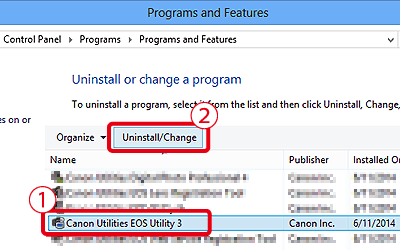
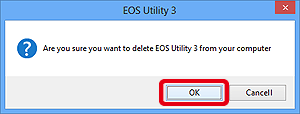
3. A dialogue box similar to the one in the example image below will be displayed.
Click [OK] to begin the uninstallation of [EOS Utility 3].
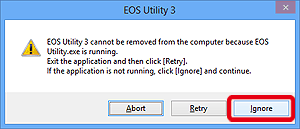
4. Click [Ignore].
5. If the software is successfully uninstalled, the following screen will appear. Click [OK] to close the window.
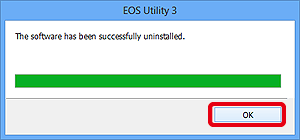
This completes the procedure for uninstalling EOS Utility Ver. 3.x.
1. After uninstalling EOS Utility Ver. 3.x using one of the procedures above, please restart your computer.
IMPORTANT
- To prevent possible operational problems, make sure to restart your computer after uninstalling EOS Utility Ver. 3.x. Re-installing the software without restarting your computer first may cause operational problems to occur.
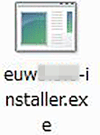
2.Double-click the [euwxxx_installer] file. If your computer does not contain the file, please connect to the internet and download it from the Canon website.
IMPORTANT
- Internet access is required to use this function, and any ISP account charges and access fees must be paid separately.
- When performing installations/deinstallations, please log on to the computer as an Administrator.
NOTE
- In some cases, the [User Account Control] screen may appear. In this case, please click [Yes].
3. Select the area in which you live.
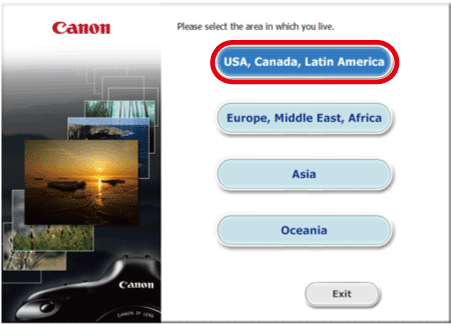
4. Select the country where you live, and then click [Next].

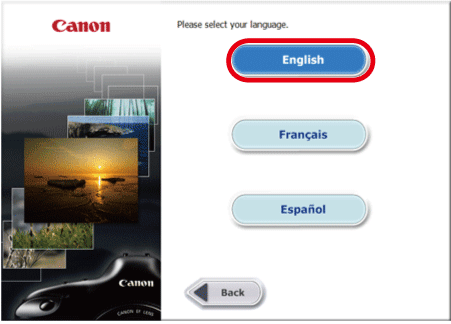
5. Select the desired language.
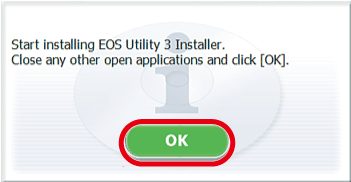
6. After the message appears prompting you to exit other applications, exit other applications and then click [OK].
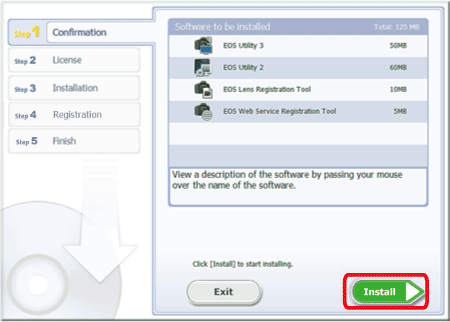
7. Click [Install].
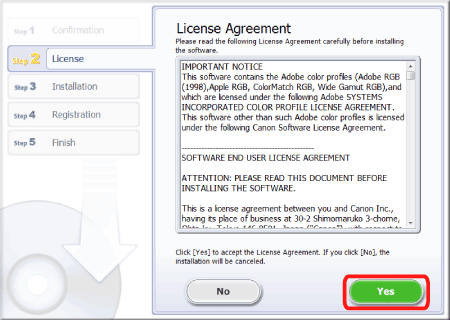
8. If you accept the [License Agreement], click [Yes] to install the software.
NOTE
- In some cases, the [User Account Control] screen may appear. In this case, please click [Yes].
9. Installation begins.

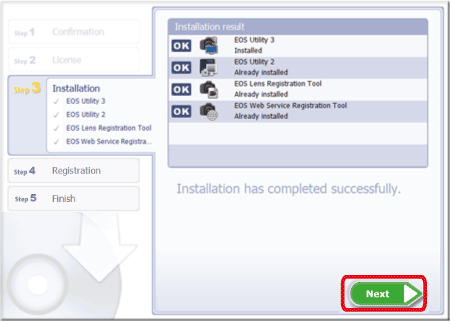
10. When the installation has completed, 'Installation has completed successfully' appears. Click [Next].
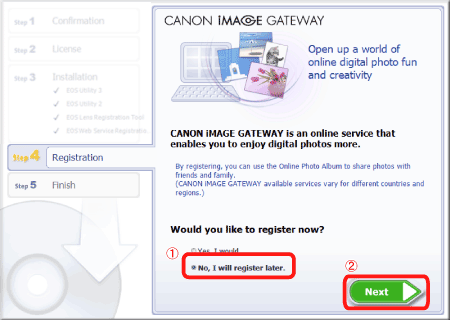
11. The following screen is displayed. Select  [No, I will register later.], and then click
  [Next].
[No, I will register later.], and then click [Next].To register your camera on CANON iMAGE GATEWAY, click [Yes, I would.].
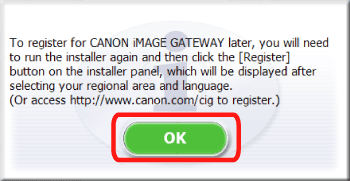
12. Click [OK].
13. Click [Finish].
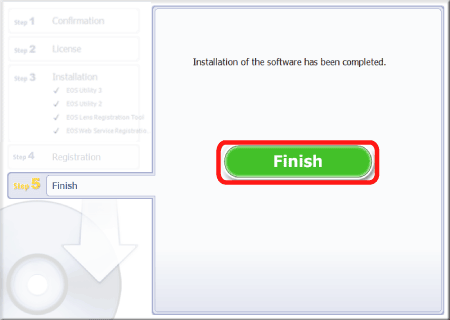
This completes the procedure for re-installing EOS Utility 3.x.